Masonry是一个轻量级的布局框架 拥有自己的描述语法 采用更优雅的链式语法封装自动布局 简洁明了 并具有高可读性 而且同时支持 iOS 和 Max OS X。
Masonry是一个对系统NSLayoutConstraint进行封装的第三方自动布局框架,采用链式编程的方式提供给开发者API。系统AutoLayout支持的操作,Masonry都支持,相比系统API功能来说,Masonry是有过之而无不及。也就是说Masonry就是NSLayoutConstraint,只不过是提供了更加简单的书写方法。如果你对NSLayoutConstraint有所了解,那么Masonry可以说是简单易懂
Masonry属性与NSLayoutAttrubute的对照表如下
| Masonry |
NSLayoutAttrubute |
说明 |
| left |
NSLayoutAttrubuteLeft |
左侧 |
| top |
NSLayoutAttrubuteTop |
上侧 |
| right |
NSLayoutAttrubuteRight |
右侧 |
| bottom |
NSLayoutAttrubuteBottom |
下侧 |
| leading |
NSLayoutAttrubuteLeading |
首部 |
| trailing |
NSLayoutAttrubuteTrailing |
尾部 |
| width |
NSLayoutAttrubuteWidth |
宽度 |
| height |
NSLayoutAttrubuteHeight |
高度 |
| centerX |
NSLayoutAttrubuteCenterX |
水平中心 |
| centerY |
NSLayoutAttrubuteCenterY |
竖直中心 |
| baseline |
NSLayoutAttrubuteBaseline |
文本基线 |
NSLayoutAttrubute
下面是用NSLayoutAttrubute,约束一个子视图,使之每个边与其父视图间距为10
1
2
3
4
5
6
7
8
9
10
11
12
13
14
15
16
17
18
19
20
21
22
23
24
25
26
27
28
29
30
31
32
33
34
35
36
37
38
39
40
41
42
43
44
45
| UIView *superview = self.view;
UIView *view1 = [[UIView alloc] init];
view1.translatesAutoresizingMaskIntoConstraints = NO;
view1.backgroundColor = [UIColor greenColor];
[superview addSubview:view1];
UIEdgeInsets padding = UIEdgeInsetsMake(10, 10, 10, 10);
[superview addConstraints:@[
[NSLayoutConstraint constraintWithItem:view1
attribute:NSLayoutAttributeTop
relatedBy:NSLayoutRelationEqual
toItem:superview
attribute:NSLayoutAttributeTop
multiplier:1.0
constant:padding.top],
[NSLayoutConstraint constraintWithItem:view1
attribute:NSLayoutAttributeLeft
relatedBy:NSLayoutRelationEqual
toItem:superview
attribute:NSLayoutAttributeLeft
multiplier:1.0
constant:padding.left],
[NSLayoutConstraint constraintWithItem:view1
attribute:NSLayoutAttributeBottom
relatedBy:NSLayoutRelationEqual
toItem:superview
attribute:NSLayoutAttributeBottom
multiplier:1.0
constant:-padding.bottom],
[NSLayoutConstraint constraintWithItem:view1
attribute:NSLayoutAttributeRight
relatedBy:NSLayoutRelationEqual
toItem:superview
attribute:NSLayoutAttributeRight
multiplier:1
constant:-padding.right],
]];
|
而使用了Masonry实现相同的约束,仅仅需要几行代码
1
2
3
| [view mas_makeConstraints:^(MASConstraintMaker *make) {
make.edges.insets(UIEdgeInsetsMake(10, 10, 10, 10))
}]
|
安装方式
Masonry支持CocoaPods,可以直接通过podfile文件进行集成,要在CocoaPods中添加下面代码:
1
2
| pod 'Masonry'
pod install
|
之后直接在项目中引用即可,详情请参考github
使用方式
首先是约束的相关api
1
2
3
4
5
6
7
8
| - (NSArray *)mas_makeConstraints:(void(^)(MASConstraintMaker *make))block;
- (NSArray *)mas_updateConstraints:(void(^)(MASConstraintMaker *make))block;
- (NSArray *)mas_remakeConstraints:(void(^)(MASConstraintMaker *make))block;
/*
mas_makeConstraints 只负责新增约束 Autolayout不能同时存在两条针对于同一对象的约束 否则会报错
mas_updateConstraints 针对上面的情况 会更新在block中出现的约束 不会导致出现两个相同约束的情况
mas_remakeConstraints 则会清除之前的所有约束 仅保留最新的约束
*/
|
在使用Masonry的约束之前,首先要将view添加到superview上
之后调用mas_makeConstraints添加相应的约束
居中
1
2
3
4
5
| [view mas_makeConstraints:^(MASConstraintMaker *make) {
make.centerX.equalTo(subView.mas_centerX); // 水平
make.centerY.equalTo(subView.mas_centerY); // 竖直
make.size.mas_equalTo(CGSizeMake(100, 100));
}];
|
边距
1
2
3
4
5
6
7
8
9
10
11
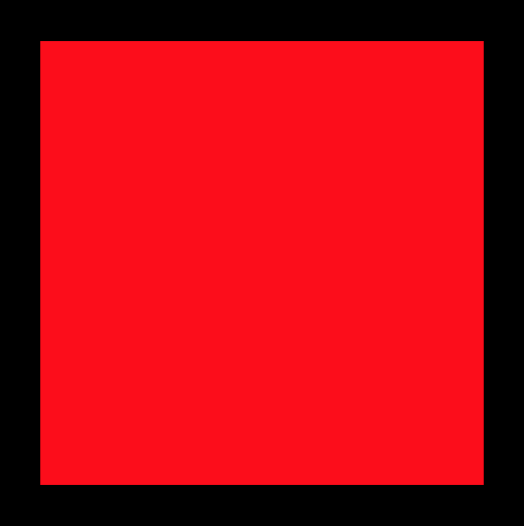
| // 添加一个与父视图上下左右都相距20的view
[view mas_makeConstraints:^(MASConstraintMaker *make) {
make.edges.insets(UIEdgeInsetsMake(20, 20, 20, 20));
/*
make.top.equalTo(subView).with.offset(20);
make.left.equalTo(subView).with.offset(20);
make.bottom.equalTo(subView).with.offset(-20);
make.right.equalTo(subView).with.offset(-20);
*/
}];
|
并列
1
2
3
4
5
6
7
8
9
10
11
12
13
14
15
16
17
|
[view1 mas_makeConstraints:^(MASConstraintMaker *make) {
make.centerY.equalTo(subView.mas_centerY);
make.left.equalTo(subView.mas_left).with.offset(20);
make.right.equalTo(view2.mas_left).with.offset(-20);
make.height.mas_equalTo(@150);
make.width.equalTo(view2);
}];
[view2 mas_makeConstraints:^(MASConstraintMaker *make) {
make.centerY.equalTo(subView.mas_centerY);
make.left.equalTo(view1.mas_right).with.offset(20);
make.right.equalTo(subView.mas_right).with.offset(-20);
make.height.mas_equalTo(@150);
make.width.equalTo(view1);
}];
|
1
2
3
4
5
6
7
8
9
10
11
12
13
14
15
16
|
[view1 mas_makeConstraints:^(MASConstraintMaker *make) {
make.centerX.equalTo(subView.mas_centerX);
make.top.equalTo(subView.mas_top).with.offset(20);
make.bottom.equalTo(view2.mas_top).with.offset(-20);
make.width.mas_equalTo(@150);
make.height.equalTo(view2);
}];
[view2 mas_makeConstraints:^(MASConstraintMaker *make) {
make.centerX.equalTo(subView.mas_centerX);
make.top.equalTo(view1.mas_bottom).with.offset(20);
make.bottom.equalTo(subView.mas_bottom).with.offset(-20);
make.width.mas_equalTo(@150);
make.height.equalTo(view1);
}];
|
1
2
3
4
5
6
7
8
9
10
11
12
13
14
15
16
17
18
19
20
21
22
23
24
25
26
27
28
29
| // 上层左右并列,并与下层对其
[view1 mas_makeConstraints:^(MASConstraintMaker *make) {
make.centerX.equalTo(subView.mas_centerX);
make.top.equalTo(subView.mas_top).with.offset(20);
make.bottom.equalTo(view2.mas_top).with.offset(-20);
make.left.equalTo(subView.mas_left).with.offset(20);
make.right.equalTo(view3.mas_left).with.offset(-20);
make.width.equalTo(view3.mas_width);
make.height.equalTo(view2);
}];
[view3 mas_makeConstraints:^(MASConstraintMaker *make) {
make.centerX.equalTo(subView.mas_centerX);
make.top.equalTo(subView.mas_top).with.offset(20);
make.bottom.equalTo(view2.mas_top).with.offset(-20);
make.left.equalTo(view1.mas_right).with.offset(20);
make.right.equalTo(subView.mas_right).with.offset(-20);
make.width.mas_equalTo(view1.mas_width);
make.height.equalTo(view2);
}];
[view2 mas_makeConstraints:^(MASConstraintMaker *make) {
make.centerX.equalTo(subView.mas_centerX);
make.top.equalTo(view1.mas_bottom).with.offset(20);
make.bottom.equalTo(subView.mas_bottom).with.offset(-20);
make.left.equalTo(subView.mas_right).with.offset(20);
make.right.equalTo(subView.mas_right).with.offset(-20);
make.height.equalTo(view1);
}];
|
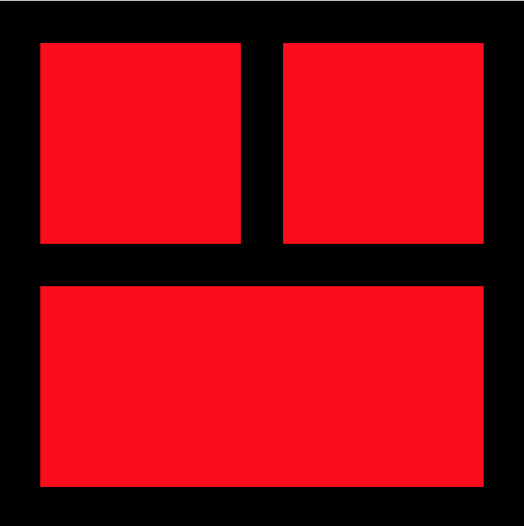
1
2
3
4
5
6
7
8
9
10
11
12
13
14
15
16
17
18
19
20
21
22
23
24
25
26
27
| // 右侧上下并列,并与左侧对其
[view1 mas_makeConstraints:^(MASConstraintMaker *make) {
make.centerY.equalTo(subView.mas_centerY);
make.left.equalTo(subView.mas_left).with.offset(20);
make.right.equalTo(view2.mas_left).with.offset(-20);
make.top.equalTo(subView.mas_top).with.offset(20);
make.bottom.equalTo(subView.mas_bottom).with.offset(-20);
make.width.equalTo(view2);
}];
[view2 mas_makeConstraints:^(MASConstraintMaker *make) {
make.left.equalTo(view1.mas_right).with.offset(20);
make.right.equalTo(subView.mas_right).with.offset(-20);
make.top.equalTo(subView.mas_top).with.offset(20);
make.bottom.equalTo(view3.mas_top).with.offset(-20);
make.width.equalTo(view1);
make.height.equalTo(view3);
}];
[view3 mas_makeConstraints:^(MASConstraintMaker *make) {
make.left.equalTo(view1.mas_right).with.offset(20);
make.right.equalTo(subView.mas_right).with.offset(-20);
make.top.equalTo(view2.mas_bottom).with.offset(20);
make.bottom.equalTo(subView.mas_bottom).with.offset(-20);
make.width.equalTo(view1);
make.height.equalTo(view2);
}];
|

小结
以上仅仅是最最基础的布局,在实际的生产过程中要复杂许多。但是Masonry的确简化了NSLayoutConstraint的写法,使之更加语义化。虽然写法更加的复杂,对于团队开发也是一种规范。写下本笔记主要是为了记载自己学习Masonry的过程,暂时不能投入生产中,也无法更加熟练深刻的运用,仅记之以供后日查阅。
